kellan_the_tabby: (wedding)
[personal profile] kellan_the_tabby
P_20200120_131149_vHDR_On

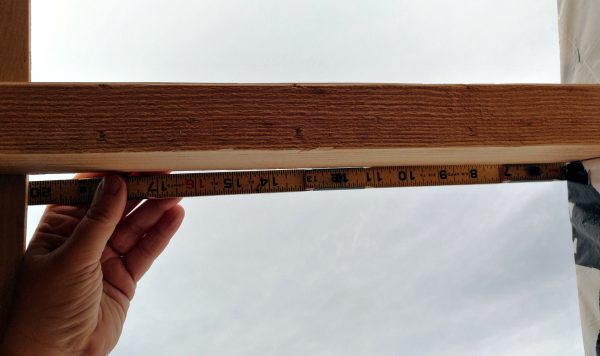
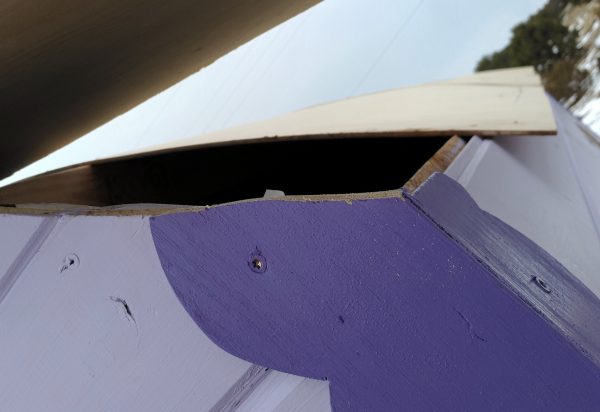
Because of the rafters, I needed more than sixteen feet of roof. To be precise, as seen above, I needed sixteen feet & 20.5 inches of roof, so that’s what I cut.

That piece went on the back section of the roof, & the rest of that sheet of plywood went along the side, which is enough to cover nearly the entire roof.

A view of the back half of the tinker's wagon's roof, from the side. Nearly all of it is covered in plywood now, but there's a gap to the left side, at the base of the roof.

There’s just a bit of a gap left in the middle. I’ve got enough thin plywood to cover that up, but that’s got to wait a while, because right now, that’s the only way I can safely get on & off the roof.

I had to go round to the other side & screw down the bottom edge of that board, as before. Tom helped.

A view, facing down, of my boots, a cordless saw, & a mostly-empty bin of screws, all of which are on the folding worktable I've been using. Major Tom is sitting on the ground, looking up.

Or maybe he just wanted a Love.

Pretty much the same view, except now Major Tom is on the table next to my boots.

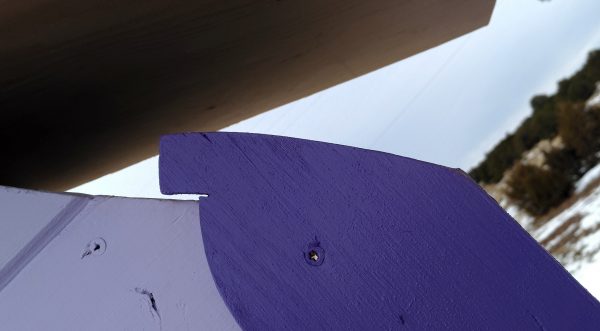
Of course nothing quite fits like it’s supposed to — that’s how the world works, & also, I can’t cut a straight line — so this needed to be trimmed down before I could fasten the roof at that corner.

The top of one of the pieces of gingerbread trim that covers the corners of the tinker's wagon. It's sticking up past the curve where the roof's supposed to go by about an inch.

That’s okay, to misquote Grimjack. I’ve got another saw.

Now it's not.

Did I mention I can’t cut a straight line? Cos I can’t cut a straight line. This is lined up.

It's the joint where two of the sheets of roof plywood are supposed to line up, except that they don't. Some of the gap is a good three-quarters of an inch wide.

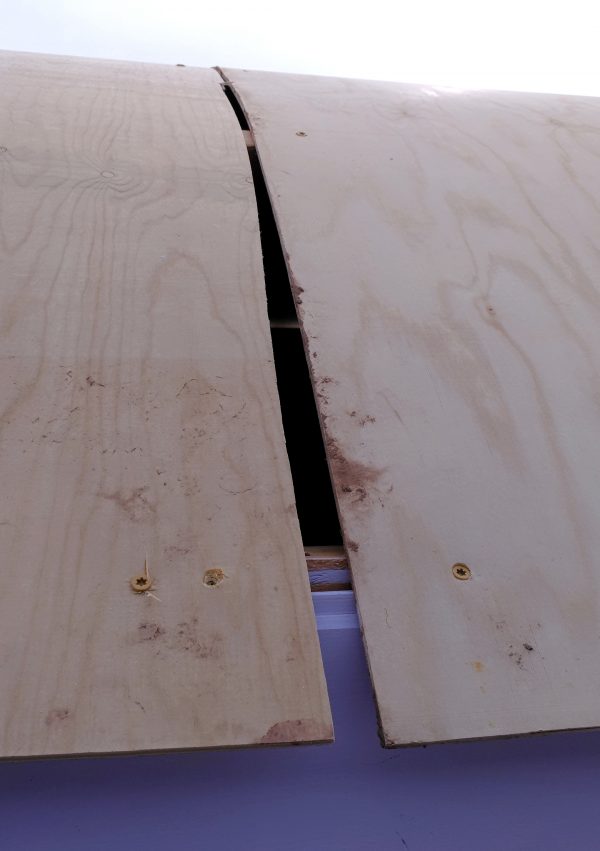
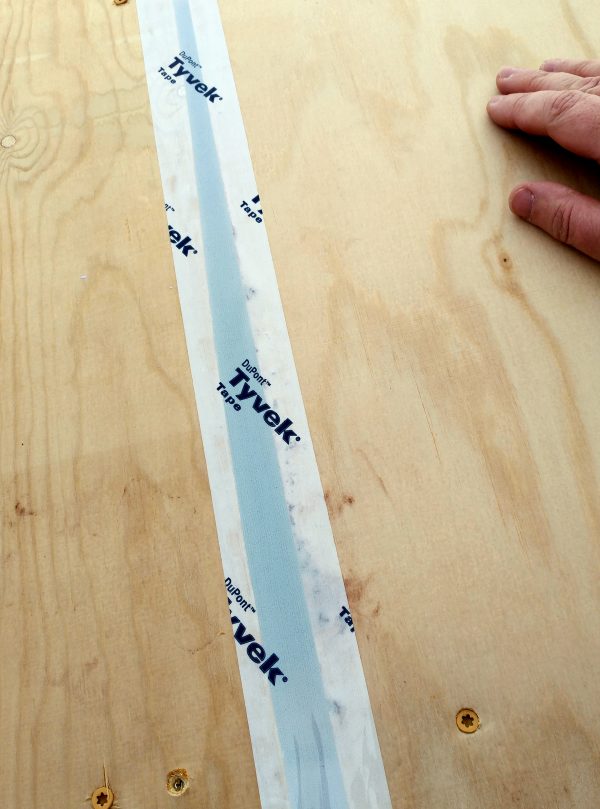
This is, also, why I’m glad I bought three rolls of Tyvek tape. I was gonna be taping all of the gaps between boards anyway.

Tyvek tape will, as the saying goes, cover a multitude of sins, or at least gaps, which is what it's done here.

The view from inside. Roof!

Yep, that's what it is. The light shows through the Tyvek tape a bit.

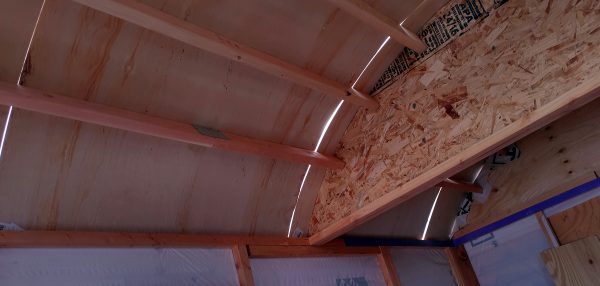
With bonus skylight!

The unfinished section of the roof, seen from the inside. It's maybe two feet wide & a foot and a half high.

Next up, I’ll be coming up with a way to fasten down the bit where the plywood overlaps, taping up the rest of the gaps, & covering the entire roof with housewrap. Then, napping.


This was posted originally to my Patreon, a little over a week ago.

If you want to see these posts sooner, & not incidentally help support me & my cats in our travels & such, the way to do that is to sign up as one of my Patrons for as little as a buck a month.

I’d REALLY like that.


originally posted on Patreon; support me over there to see posts a week early!

Date: 2020-01-31 02:50 am (UTC)
siliconshaman: black cat against the moon (Default)
From: [personal profile] siliconshaman
You're welcome. the secret is to use more silicon sealant/adhesive than you think you'll need. [yeah, I found that after I built the back part that leaks] and seal the edges solid. That and have the lip of the inner frame be above the roof level by about half an inch to an inch. Which I suppose if you're talking about a flat line at tangent to he curved roof, means you need an inner frame that's six inches deep minimum, so it's comfortably above the curve of the roof at all points.

BTW, what are you using to saw with? because if it's a jig saw you can cut straight line by holding/screwing down a sight edge [plank, ruler] amd resting the side of the foot plate against that. You just have to off-set it from the line you want to cut by half the width of the metal foot plate. [I got sick of wonky cuts too!]

Date: 2020-02-01 01:12 am (UTC)
siliconshaman: black cat against the moon (Default)
From: [personal profile] siliconshaman
If I may make a suggestion.. make yourself a couple of saw horses. The time spent on making the right tools for a job, is well worth the time you save trying to do it the hard way. You can make a cutting table by balancing a pallet or an old door or a couple of lengths of scrap timber across them, then put a sheet of ply on it to cut.

Date: 2020-02-01 02:06 am (UTC)
siliconshaman: black cat against the moon (Default)
From: [personal profile] siliconshaman
Ah, I just sawed a pallet in half, and then bolted some legs made out of 2x2 to them, with a few 2x1 lengths cross wise and diagonal across the corners to brace them.

Once I'm done with them, I'll bolt them together and make a picnic table for the patio.

June 2025

S M T W T F S
1234567
89 101112 1314
15161718192021
22232425262728
2930     

Most Popular Tags

Page Summary

Style Credit

Expand Cut Tags

No cut tags
Page generated Jun. 23rd, 2025 07:24 pm
Powered by Dreamwidth Studios